If you watched my video with The Financial Diet on navigating fast fashion and quality, you already know the big reframe: your body is not the problem, the sizing system is. Numbers on a tag are marketing, not information. Your actual measurements are the one thing that stays consistent no matter whose chart you’re looking at.
The video covered the core four measurements that’ll get you through most shopping decisions. This guide goes one layer deeper – the secondary measurements that matter most if you’re sewing, having something tailored, shopping for a very fitted garment, or just want to understand your body’s proportions more precisely.
Before You Start
- Measure in a fitted layer only – not over bulky clothing.
- Stand naturally. Don’t suck in, don’t hold your breath, don’t throw your shoulders back.
- Use a mirror, ask someone to help, or feel where the tape crosses and pull it off yourself to read it. Don’t bend forward to check the number – that distorts the measurement.
- The tape should be snug but not tight. If it’s indenting your skin, it’s too tight. If you can easily slip a hand between the tape and your body, it’s too loose.
- If you have breasts and are measuring for a fitted top or dress, wear the type of bra you plan to wear with the finished garment. It changes the numbers more than people expect.
- Measure twice for anything you’re unsure of.
- If your body is asymmetrical anywhere (most bodies are, at least a little), note it – it matters for pattern or alteration decisions later.
The Core Measurements
Chest/Bust
Fullest part of the chest, tape parallel to the floor, no squishing.
Waist
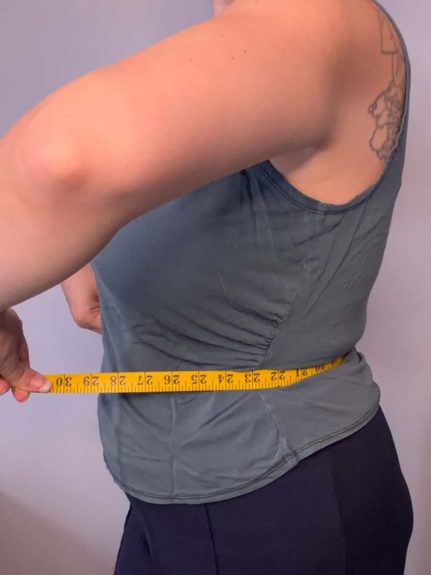
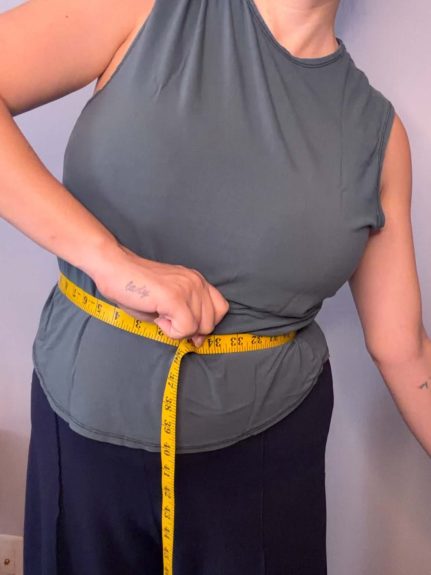
Find the small of your back, then bring the tape straight around to the front from that point. To confirm you’re in the right spot, bend directly to one side – think “I’m a little teapot” – and you should feel a slight crease or fold right at that line. That’s your natural waist. It’s not necessarily where your pants sit, and not necessarily at your belly button. Keep the tape parallel to the floor.
High Hip
3-4″ below your natural waist, at your actual hip bones.
Full Hip
The widest point of your hips and rear, usually 7-9″ below your natural waist. I like to start across my backside first for placement, then come around to the front, keeping the tape straight the whole way around.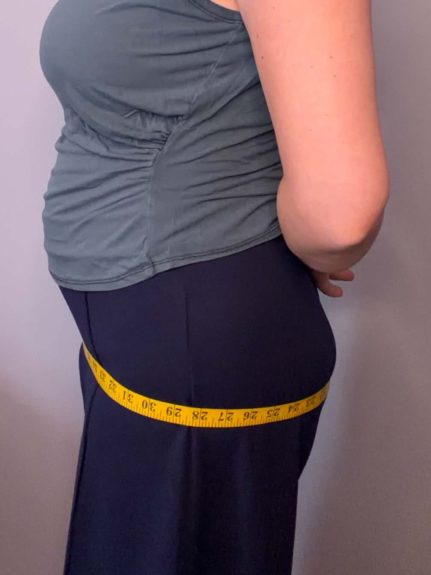
Inseam
Crotch to ankle, along the inner leg.
Secondary Measurements (For a More Comprehensive Fit Picture)
These matter most for sewing, custom work, tailoring conversations, or very fitted garments where every inch counts.
Shoulder to Apex / Shoulder to Chest
From the top of your shoulder (where a seam would sit) down to the bust point. Useful for anything with princess seams, darts, or a fitted bodice.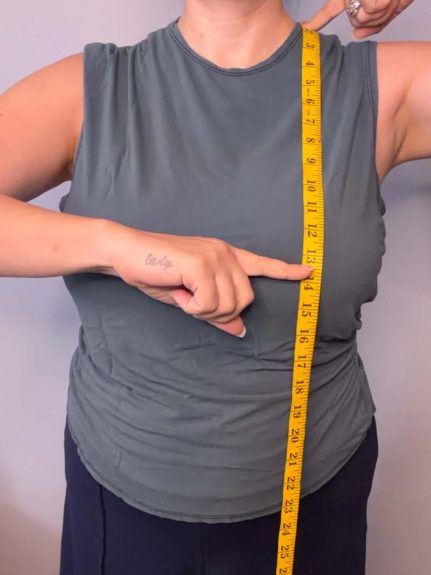
Shoulder to Natural Waist
From the same shoulder point down to your natural waist. This helps determine proper garment length through the torso and whether a top is going to hit you where it’s designed to.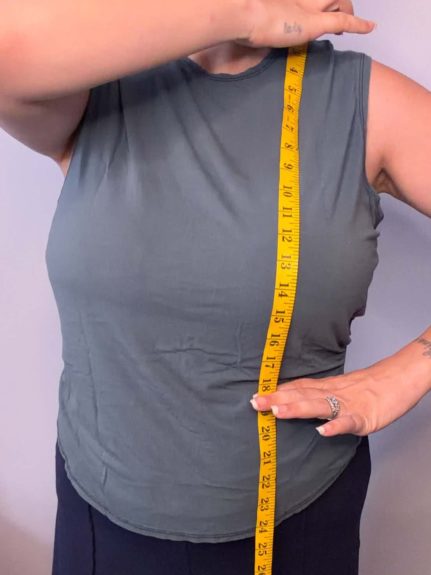
Apex to Apex
Bust point to bust point, straight across. Useful for checking dart placement and bust spacing on fitted garments.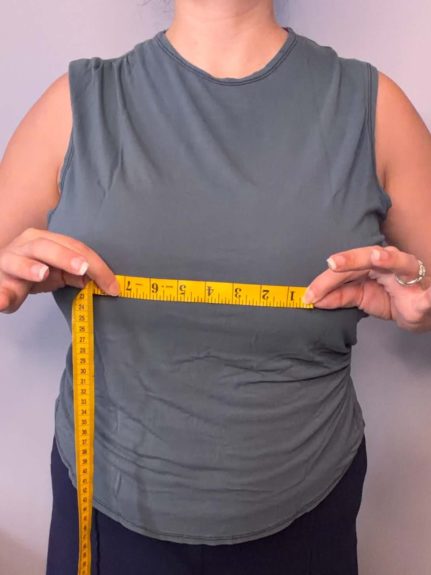
Sleeve Length
From the shoulder seam to the wrist, along the outside of your arm, with your arm slightly bent.
Bicep Circumference
Fullest part of your upper arm.
Elbow Circumference
Around the elbow, arm slightly bent.
Wrist Circumference
Around the wrist, at the bone.
Thigh Circumference
Fullest part of the thigh.
Knee Circumference
Around the knee.
Ankle Circumference
Around the ankle, at the narrowest point.
Rises (Front and Back)
This is the measurement that determines where pants sit and how they feel in the crotch – and it’s measured separately for front and back, since they’re rarely identical.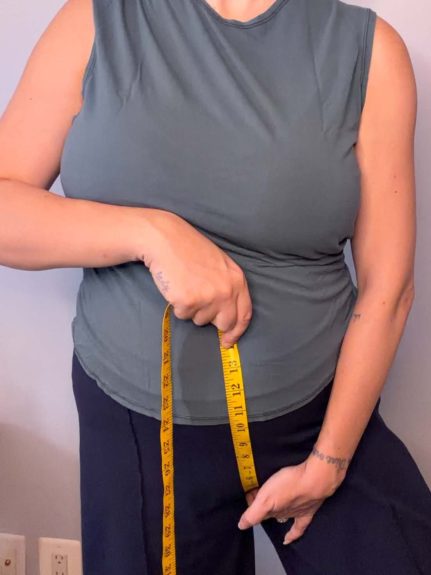
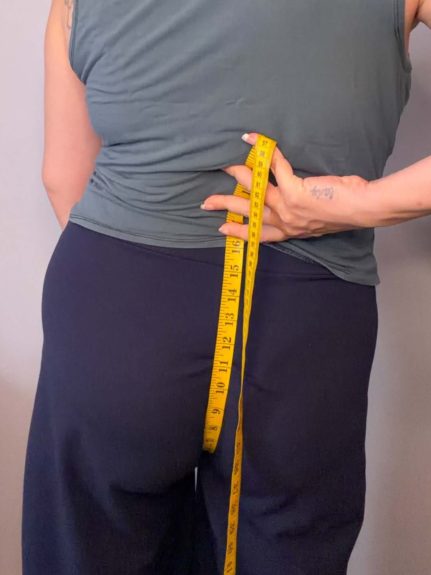
- High rise: center crotch to natural waist
- Mid rise: center crotch to your hip bones
- Low rise: center crotch to wherever you find a low-rise waistband comfortable
Neck Circumference
Around the base of the neck, where a collar would sit.
Center Back Neck to Waist
From the bone at the base of your neck straight down your spine to your natural waist. This is one of the most useful torso-length measurements for anything fitted through the back.
Across Front / Across Back
Across Front is measured about 5″ down from the shoulder point; Across Back is measured about 4-5″ down from the center back neck point. These help assess shoulder and upper torso width independent of circumference.
How to Actually Use These Numbers
Once you have your measurements, the next step is matching them to a brand’s actual size chart – not a generic one, and not your intuition about what size you “normally wear.” Cross-reference your numbers against the specific chart for the specific garment or category you’re shopping, since even within the same brand, fit can vary by product line.
If you’re between two sizes, the general rule is: size up and alter down. It’s much easier for a tailor to take something in than to let it out.
And if there’s a part of your body that’s consistently hard to fit – a long torso, a smaller waist-to-hip ratio, broader shoulders, whatever it is – look for brands that publish extra measurement detail in that specific area, or email and ask directly. A brand that can’t answer a specific fit question is telling you something too.
Your measurements are real, and they’re yours regardless of what any tag says. That’s the whole point.